Monday, September 10, 2012

Cornmeal Biscotti

Not to long ago I posted a link to a Caprese Jam, makes just a small batch. (http://nourishandpreserve.wordpress.com/2012/08/27/quick-canning-small-batch-caprese-jam/). Well I made that jam and it is just wonderful! Now if you are not a canner, this is just perfect for you, it makes about two 1/2 pint jars. And it will last a bit in the frig, but to be honest it won't be around for long once you try it!! (I have made it twice more but I doubled the batch so I could can it....I will be very happy!

Once I tasted it, I wanted to create something unique and easy to make to go with it! It was just great on grilled french bread...but these biscotti give just something that the two play very well! I do hope you try both!!

copyright catmacera2012
 
1 1/2 c flour
1/2 c course cornmeal** (regular will work)
1/2 c sugar
1 tsp baking soda
1/4 tsp kosher salt
2 tbsp fresh rosemary, finely chopped
1 tbsp fresh thyme, chopped
1/4 c toasted pine nuts (or chopped walnuts)
2 eggs
1 tsp vanilla
4 tbsp olive oil
 
Preheat oven to 350 degrees F. Line a baking sheet pan with parchment paper.
 
In a large bowl whisk together flour, cornmeal, sugar, baking soda, salt, pine nuts, rosemary and thyme. Set aside.
 
In a small bowl beat together the eggs, vanilla and oil. Make a well in the middle of the dry ingredients, pour in the egg mixture. Slowly stir the dry into the liquid, until  it forms a soft dough.
 
Turn dough out onto a lightly floured surface. Knead the dough until smooth (this dough is soft, only add flour to prevent sticking). Divide in half. Form each half into a 8" log. Place on prepared pan and pat down to flatten slightly.
 
Bake at 350 degrees F for 20 minutes. (rotate try halfway through time). Remove to a cooling rack for 20 minutes. Reduce oven to 250 degrees F.
 
With a serrated knife cut into about 1/2" slices. Place them on baking sheet. Place in oven and bake for another 20 minutes, gently flipping the cookie halfway through. Place on cooling rack.
 
**I use local cornmeal (and actually my flour comes from Champlain Valley!) Gianforte Farms in Casenovia, in fact I get my dried red and black beans and whole wheat bread flour. check them out:
http://gianfortefarm.com/  and their Three Grain cereal is fantastic!)


Friday, August 31, 2012

Rosemary Berry Cornmeal cake

I like this cake as it makes a single 8", it is not overly sweet and makes a lovely dessert or you can serve with tea in the afternoon. (Also great for a brunch!) I used frozen berries in this but fresh would be great! If you don't like blackberries, you could very easily use blueberries or even raspberries. If you are gluten free , you could use buckwheat flour in place of the AP flour. Using farm fresh eggs is what helps give a golden richness to this cake.


copyright catmacera2012
 
 
1/2 c unbleached AP flour
1/2 c coarse cornmeal (regular is fine)
2 tbsp finely chopped fresh rosemary
1 tsp baking powder
1/4 tsp kosher salt
4 egg yolks
2 whole eggs
4 oz softened butter
1 tbsp vanilla extract
1/2 c sour cream
1 1/2 c powder sugar
1 1/2 c blackberries (if frozen toss with 2 tbsp flour), do not thaw
 
Preheat oven to 350 degrees F. Grease and flour an 8" cake pan.
 
Whisk together the flour, cornmeal, rosemary, baking powder and salt; set aside.
 
In a large mixing bowl beat the butter, vanilla and powder sugar on low to combine. Scrape down bowl, then beat for 5 minutes on high until light and fluffy. Add in the whole eggs and yolks one at a time. Scraping down the bowl occasionally. Add in sour cream. Beat just to combine.
 
Stir in the flour mixture, then gently fold in berries. Pour into prepared pan and spread out evenly.
 
Bake at 350 degrees for 40-50 or until the cake starts to pull away from the edge and the middle is firm.
 
Cool on rack for 10 minutes, then gently invert onto rack, removing the pan. Cool completely. Dust top with powder sugar.


Mixed Heirloom Tomato grilled Pizza

Well did you see those beautiful purple (almost black) and red tomatoes the Guardi's had? Beautiful they were! What a great a fairly quick meal this is. I imagine some people are nervous about grilling pizza, but if you are a fan of a thinner, crisper crust this the way to go! You can use store bought, but making you own is so easy and only takes one hour to rise!

copyright catmacera2012


8 - 10 small/medium heirloom tomatoes
olive oil
Parmesan cheese
fresh basil
3-4 slices prosciutto, sliced into thin strips
s/p

For the Dough:
1 c warm water
1 packet yeast (2 1/4 tsp)
1 tbsp sugar (or honey)
1 tbsp olive oil
1/2 tsp kosher salt
2 1/2 c flour

In a large skillet heat about 4-5 tbsp of olive oil. Chop tomatoes in to large chunks, leaving small ones whole. Add tomatoes to the hot oil. Stir to coat all the tomatoes, season with salt and pepper. Reduce heat to medium, continue to cook, stirring occasionally, until the tomatoes break down a little and becomes thicker sauce. (There still should be bigger pieces of tomatoes). Taste and adjust seasoning. Allow to cool while the dough is rising.

TO MAKE THE DOUGH:

Pour the water in a large bowl. Sprinkle yeast and sugar over the water, stir lightly. Let stand for about 5 minutes. Add in oil and salt. Add 1 c of flour, stir to combine. Continue to add flour about 1/4 at a time, until the dough becomes a nice soft ball the pulls away from the sides of the bowl. Turn out onto a floured surface and knead for about 5 minutes, adding flour to prevent sticking.

Sprinkle flour on counter and place dough on top of flour. Cover with the same bowl or a towel. Let stand for about 45- 60 minutes.

Preheat grill on high fro 10-15 minutes. (you want it HOT)

On a lightly floured surface roll out dough to a rectangle ( or whatever shape will fit you grill, you can even divide it and make smaller personal pizza), making sure that the dough stays floured well to prevent sticking. (but not too much flour) Lightly oil a baking sheet that will hold the dough for transporting. Place dough on sheet pan. Carefully place dough on grill (it easiest to carefully fold the dough in half to get on the grill then open it up). Turn the heat down to low. Close the lid.

Let dough cook for about 5 minutes or until golden. Using a spatula flip the dough. Spread the tomato sauce over top, sprinkle the prosciutto and cheese over top. Close the lid and cook for another 5 minutes or so. Remove to a large tray or cutting board, Sprinkle with torn fresh basil.

Cut and serve with a simple salad.


Thursday, August 30, 2012

Grilled Watermelon, jalapeno and Feta Salad

This surprises so many people when say "grilled watermelon", but truly this adds such a depth of flavor! You can skip this part, although I would suggest you try at least once if you can! The amount of jalapeno is up to you, more for spicier or less (even none). I will often do this with both red and yellow melon.

copyright catmacera2012
5-6 slices of watermelon,2-3" thick*
oil (neutral, like grape seed)
3 tbsp chopped basil
4 oz JFF Feta cheese
3 tbsp honey whisked with 1 tbsp oil
1 jalapeno, char roasted, skin and seeds removed, finely diced

Heat grill on high. Grill the jalapeno until charred nicely. Remove to a bowl and cover with plastic wrap; set aside. Brush the watermelon lightly with oil . Reduce heat on grill to medium. Place slices on grill. Watching carefully, let melon char slightly, turn once. Remove from grill to a platter.

Cut the watermelon slices in bite size pieces place in bowl.  Drizzle honey/oil, add basil and jalapeno. Toss to coat well. Crumble feta and gently toss with melon. Serve at room temperature.

Tuesday, August 28, 2012

Yellow Squash Hash

Breakfast isn't just for the morning! The yellow squash adds a earthy sweetness and a depth of flavor that plays well with the egg. I have done the eggs poached or over easy and both are equally flavorful way to start or even end the day. This adjust very easily to feed many or two!

copyright catmacera2012
 

1 md sized yellow squash, diced
4-5 new potatoes, cleaned and diced
1/4 c fresh basil, finely chopped
1/8 c fresh parsley, finely chopped
1 small onion finely diced
2 cloves of garlic, minced
s/p
evoo
butter
eggs


In a large skillet melt together 2 tbsp of oil and 2 tbsp butter over md/hi heat. Add in onion and garlic, saute for 5-7 minutes.

Add in potatoes, toss to coat adding more oil if needed. Cook for 7-9 minutes over md heat. Stir often to prevent burning. Add in  squash and if needed a little more oil. Continue to cook, letting the the potato and squash take on a nice golden color, about 15-20 minutes.

Remove from hear add in basil and parsley. Serve with egg of choice and toast.

Beet and Feta Salad

My goodness I can not believe we are approaching Labor day weekend already! To think we only have about 2 months left (as always weather pending) of the market! Rumor has it we will be have a very warm fall! So this salad will be wonderfully refreshing.

copyright catmacera2012

4-5 beets, trimmed and cleaned
evoo
s/p
1 sprig rosemary, finely minced
1/4 c lemon marmalade
4 oz JFF Feta Cheese

Preheat oven to 400 degrees f. Place beets in a roasting pan, drizzle with oil, season with s/p and rosemary. Roast for 45-50 or until fork tender. Allow to cool enough to handle. Peel off skin. Cut into slices, then into strips. Place in a large bowl.

In a separate bowl whisk together marmalade and 1/3 evoo. Season with black pepper. Pour over still warm beets. Allow the beets to cool to room temperature. Crumble feta and toss with beet mixture.

Wednesday, July 25, 2012

Zucchini Coconut Cheesecake


So here we are it is Wednesday, and I have two more recipes to post from last weeks bounty! I still have 9 bulbs of garlic (buying the bunch is such a great investment, I will get another this week, to store in my root cellar, and that garlic will keep until Feb/Mar of next year, store in a cool dark area) I have one head of lettuce, scallions and potatoes left, all of which are earmarked for dinner tonight! I would say that the $30 dollars I spent last week served me well for the week! Shopping at a farmers market is no more expensive then a grocery store, but the benefits are fantastic! You get the freshest, local produce available, you can actually talk to the very people that grow and harvest your food, you keep money local, which a boost to the local economy! No I am not anti-grocer, but for the season, why not give yourself the best at no extra cost!

So remember I got 4 c of shredded Zucchini last week and I only used 2 c. Want to make a wonderful dessert that will give 16 servings? All for $1.05/serving! (now the slice shown would easily feed 2)

Zucchini Coconut Cheesecake

copyright catmacera2012


For the base: (or use your favorite)

3/4 c buckwheat flour
3/4 c wheat pastry flour
1 c unbleached All-purpose flour
1 stick butter, melted and slightly cooled
2/3 c sugar
2 eggs,  room temperature, lightly beaten

Filling:

3 8-oz JFF Kayhoora Creme Cheese (cream cheese), room temperature
5 eggs, room temperature
1 can of Coconut Cream (not milk)
2 c shredded Zucchini that has been tossed with 2 tbsp flour*
1 tsp vanilla
1/8 tsp nutmeg

Preheat oven to 450 degrees F. You will need a 10" spring form pan and a baking sheet. In large mixing bowl (or you can use a food processor if you want) add the flour and sugar, combine well. Add in the eggs, mix just until the mixture looks like sand. With mixer on low, slowly add in the melted butter. Mixture should hold together when squeezed in your hand.

Spread this evenly on bottom of pan. Pressing to form to the pan and going about 2" up the sides of pan. Place on baking sheet in the oven for 5-7 minutes. Remove and allow to cool before adding the filling.

Reduce the oven temperature to 350 degrees F. Once crust is cool, place back on baking sheet and set aside while you mix the filling.

The key to a good cheesecake (other then JFF cream cheese that this) is to everything at room temperature. Place all of the cream cheese in the mixing bowl. Beat with paddle attachment until light and fluffy, about 5 minutes. Shake can of coconut cream well before opening. With mixer on low, slowly pour in cream. Scrap down sides, then add in salt, vanilla and nutmeg. Combine well. With mixer on low, add in eggs one at a time ( I always have mine cracked into a bowl before hand). Mixing well and scraping down sides. Fold in zucchini.*(the flour helps prevent the zucchini from settling to the bottom).

Pour batter into prepared shell. Bake at 350 degrees F for 1 hr and 20 minutes, or until a paring knife inserted comes just clean. (the cake will continue to cook, so the knife should have just a little batter on it, this helps keep a moist cheesecake). Turn off oven and crack the door slightly. Allow the cake to cook for 1 hour in the oven, then move to a cooling rack to finish.

Run a knife around the edge of pan, pop the spring and remove the cake. Wrap and refrigerate for at least 4 hours or overnight.

Allow the cake to come to room temperature before serving. This should easily give 16 servings. Store in refrigerator for 7-10 days (mine never lasts that long, gets shared and eaten long before that!)


Chicken Salad with Roasted Cherry Tomatoes

One of the reason I love to always have lettuce on hand, you can make almost any leftovers into a salad! Still working on the bounty from last week, here I make a quick and delish dinner from leftover chicken, some roasted cherry tomatoes a friend gave me.

copyright catmacera2012


Half of a cooked chicken
mayonnaise
s/p
pinch of nutmeg
slivered almonds
FairHaven Lettuce

Cherry Tomatoes, about 1 pint
s/p
olive oil
mozzarella cheese
phyllo cups*

Shred or cube chicken meat and place in a large bowl. Add in almonds and nutmeg. Stir in just enough mayonaise to coat. Refrigerate at least 1 hour.

 *You can buy the sheets, thaw according to directions, and make your own. Melt about 1/2 stick of butter. Keeping dough covered, remove one sheet at a time. Brush with butter,place another sheet on top, brush with butter, fold into quarters and form into a muffin cup. Repeat for desired amount of cups needed.
Bake in preheat 400 degree oven for 10-15 minutes or until golden. Allow to cool for a few minutes in tin, then remove to a cooling rack.

In a large skillet heat about 1/8th c of olive oil over medium heat. Add in tomatoes, season with s/p. Occasionally toss to evenly cook. Cook until lightly golden and the skin has just started to break, but the tomatoes stay whole.

Place a few tomatoes in each cup. Place on a baking, sprinkle with cheese and place under the broiler until the cheese just melts.

Rinse and drain lettuce, tear and divide among 4 plates. Top each with Chicken salad. Serve with one or two phyllo cups.

Tuesday, July 24, 2012

Chicken Stock

I love making my own stock! I can flavor it the way I want differently every batch or not! I never understand why the chef's on TV show you to make stock using a whole chicken (one show the women used 2-3!), this was always seemed like a waste, the meat is just to dry to use it for anything after simmering for hours.

I have been doing stock for years now, using only chicken backs and feet (and the left over carcass from that whole chicken you did for dinner)....OK...eeeeweeee right FEET...did she say FEET??? YES I DID! The feet bring a brilliant color and gelatin to the stock. A good stock should, when chilled, have a gelatin (aspic) texture. Now I do pressure can, which is the only way to can stock (water bath is just not good for this process), but you can freeze this very easily!

copyright catmacera2012

Really look at this wonderful color, no trick photography here!! I probably do a bit of stock, mostly chicken I will say, but beef, veggie and lamb. When winter comes and I want a good soup or making risotto, I have the best on hand when ever I need it!

Don't can? That's OK too! Freezing work just as well!! Limited space?? Here is a neat space saver, when the stock has cooled, pour off into ice cube trays and freeze. Once completely frozen, pop out of the tray and place in a freezer back! 4 cubes = 1/4 c (approx)!

CHICKEN STOCK (backs only*)

Chicken Backs, about 6
about 6-8 chicken feet (if you're squeamish, this is optional, but you honestly won't get that gelatin or color)
1 large yellow onion, halved with skin on
2 garlic cloves, whole unpeeled
about 10-12 whole black peppercorns
2-3 sprigs each of rosemary and thyme (unless you are like me and save all your fresh herb stems in the freezer, I use a good handful of just stems)
olive oil


Preheat you oven to 400 degrees F.

Place bones,feet, onion and garlic in a large roasting pan. Drizzle lightly with olive oil. Roast for 45 minutes or until everything is just golden brown (this also helps with the color).

Remove from oven and carefully place them in a large stock pot (about 7-8 quart). Add water to the roasting pan to get any left behind pieces and pour into stock pot. Fill the pot with cold water, to just below the rivets of the handles, add in the rosemary, thyme and peppercorns.

Place over high heat with lid askew and bring to a boil. Skimming off the scum as it surfaces to the top. Once boiling, reduce to a simmer, (with lid askew) for about5-6 hours. Continue to remove the scum, but try not to stir the whole mixture, this will lead to a cloudy stock.

Once the the backs fall apart when lifted, they have given their all! Turn off heat. Let cool, then remove the bones, feet, onion, garlic and herbs. Place a sieve over a 5 qt pot lined with cheese cloth or paper towel. Pour off stock, into second pan. Allow to cool if you are freezing, then pour into trays or containers.

If you are canning, following directions that came with the cannery.


* If you are doing carcass and back both you need 2 carcass and 2 backs, proceed the same.


Monday, July 23, 2012

A Simple Breakfast

Breakfast food is really one of my favorite this to work with! It's not just for morning hours anymore! I do like when I have the time though, to make a good breakfast to start the day! My cousin in Ireland, makes a feast every Sunday and his whole family gathers for the morning of feasting, lounging, reading the paper (or a book), discussions and of course a cat-nap! We (here in America) tend to do more dinner or lunch type gatherings with families, leaving brunch type meals for more of a Sunday outing. I think I see a gathering in the near future for a few of my friends! (you can even come in your jammies!!)

copyright catmacera2012


Must be the Irish (well German too) but I just love potatoes! So many things can be made with them and one of my favorite is home fries! What made this even better was I went out to patio this morning and clipped the herbs fresh!! (I bought herb plants back in May at the market and they are thriving nicely!)

copyright catmacera2012


Home Fries

10-15 Guardi's potatoes, depending on size and how many you are feeding
fresh basil, thyme and rosemary (one or two sprigs of each), finely chopped
oil and butter, about 3 tbsp each
s/p
Parmesan cheese


Rinse and dry the potatoes. In a large skillet (I love my cast iron for this job) heat oil and butter over medium heat.

Dice the potatoes into small cubes, 3/4" or so. Add in to skillet, stir to coat the potatoes in the butter, season with s/p, spread them out evenly. Let them cook, stirring to brown evenly for about 20-30 minutes. Add the fresh herbs and cheese, stir to coat, remove from heat. Tent with foil until eggs are cooked.

copyright catmacera2012


There is something to be said about farm fresh eggs!! Look at the brilliant golden orange color!! Now that is how an egg should look!! For years I didn't eat eggs, they just never agreed with me, but I tried farm fresh eggs and am happy to report I can now enjoy eggs!!

This morning I made two types: Poached on Jcookie Walnut Raisin Bread and Chicks in a Basket in my homemade sourdough cracked wheat.


For the chicks in a basket and poached on Walnut Raisin

1 slice of bread and 1 egg per person (or 2 person depending how hungry they are!)
Butter
s/p

Chicks in basket:

copyright catmacera2012


Butter one side of the bread, then using a cookie cutter, cut a hole just inside the edge of bread. Remove the circle and set aside.

In a large skillet melt about 2 tsp butter. Add the bread and circles in un-buttered side down. Toast lightly. Flip to other side. Crack an egg into each hole. Season with s/p. (don't worry if the egg white comes out a little underneath). Continue to cook until the white of egg is just about done. Flip and cook the other side for 30 seconds. Remove to a plate, flipping back over, and serve with home fries and circles.

Poached egg on Walnut Raisin:

copyright catmacera2012


Toast and butter the bread.

Bring a pan of about 3" of water to a simmer over medium heat. Add in 1 tsp white vinegar. Crack the egg into a small dish first. Then gently, being close to the water, slide the egg into the simmering water. Using a wooden spoon, gently stir the water just around the egg to help the white stay together. Simmer for about 2 1/2 - 3 1/2 minutes. Remove gently with a slotted spoon, pat gently on a towel to remove excess water.  Place on top of toast, serve with home fries (I put some hot salsa on my potatoes, as you can tell in the picture)

Beet, Spinach and Feta Salad

I went to a potluck this weekend and this is the dish I took. It must of good because I only had a spoonful left to bring home!. I would love this as a light lunch, served with some of Jcookies peasant bread that had been grilled and rub with some of FairHaven Farms garlic! But it would also be a fantastic side dish to chicken or pork.


copyright catmacera2012

1 bunch of beets, most of leaves removed
1 bag of Guardi's fresh spinach
1 pkg JFF Feta cheese
handful of pine nuts (walnuts would be good too!)

Dressing
3/4 c grape seed oil (or your favorite neutral flavored oil)
1/4 c cider vinegar
2 tbsp poppy seed
2 tsp kosher salt
2 tsp dry mustard
1/2 c sugar

Preheat oven to 400 degrees F. Rinse and dry the beats. Place in a roasting pan, drizzle with olive oil and season with s/p. Roast for 45-55 minutes, or until a paring knife pierces without resistance. Allow to cool enough that you can handle them. Wearing gloves (if you don't want you hands to stain) and gently rub the skin off, cut of both ends.

While the beets are roasting, combine all the dressing ingredients in a large mason jar (or you can place in a large bowl and whisk to combine). Place lid on tightly, and shake well to combine.

When beets are peel and still warm, cut into quarters and then thinly slice each quarter. Pour about 1/4 of dressing over the beets, toss to coat well. Let stand until cool.

Rinse and dry spinach. Place spinach in a large bowl, drizzle with dressing, toss to coat. (it maybe necessary to re-shake the dressing). Layer beets over top, then crumble feta over and them sprinkle with pine nuts.

As a meal with bread this would serve 4 at $3.75/ person! (If you used it as a side dish, it could easily feed 6 -8.)

Saturday, July 21, 2012

Swiss Chard, Shrimp and Pasta

I do love Swiss Chard! FairHaven had some beautiful bunches this week, large sturdy green leaves with the beautiful red, yellow, pink stems! Art indeed! This is a quick meal, great for during a busy week! Okay so this is meal # 2 from the bounty of thursday market!!

copyright catmacera2012
1 lb shrimp raw, shelled and deveined (I usually get the frozen then I have it on hand)
1 bunch FariHaven Swiss Chard
1 lb pasta (fettuccine, linguine or spaghetti)
3 cloves of fresh garlic, finely minced
s/p
hot pepper flakes (optional)
5-6 tbsp olive oil
2 tbsp butter
zest and juice of 1/2 fresh lemon
shaved hard cheese (optional)


Bring a large pot of water to a boil. Cook pasta according to package directions.

 If you are using frozen shrimp defrost according to package directions.


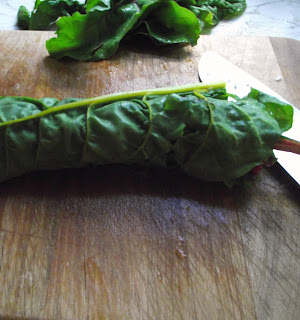
Rinse and drain the Swiss Chard. Cut the stems off, (save them in a freezer bag, you can add them to stocks that you make). Stack half the leaves and roll like a cigar.  Stack and cut remaining leaves.

copyright catmacera2012

                                                           copyright catmacera2012

Slice the roll into about 1" pieces. 

 
In a large skillet over medium heat place about 3 tbsp olive oil. Add in minced garlic. Let cook for about1 minute,  Add in the sliced Swiss Chard, toss to coat in garlic and oil. Season lightly with salt and pepper.  Allow to cook down and becomes a nice dark green. Transfer to the serving bowl. Set aside.

Add remaining oil and butter to pan with the red pepper flakes. Cook for about 30 seconds. Add in shrimp. Cook for about 1-2 minutes per side. Add in lemon juice, adjust seasoning. Return the Swiss Chard to pan toss to combine.

Drain pasta, place in serving bowl and pour the pasta over top. Toss to combine. Add shaved cheese.

This will serve 4 at $3.50 per person! 

Follow me for the week...

What a great bounty I scored at the market this week, no different then any other, though. I tend to shop farmer markets with an open mind, I look first, then think OK, what do I want for the week. I always chat with the vendors, they know best what is a short season or what will be coming in for awhile. If something has a short season, I buy that first, knowing that it is not here for long. Next, not every produce vendor carries the same items or the same amount, I never shy away from a vendor with just a few things on the table and either should you. Why, well some vendors tend to only bring what they usually sell on average, keep their produce in coolers so it stays fresh (and they rotate the produce especially in the summer heat).

copyrightcatmacers2012. Guardis Farm

So onto to my bounty. Below is all the produce I purchased for the week (along with eggs). I wanted to share with you how I stretch a dollar, eat healthy and support the farmers market. There is the great debate that markets tend to be more expensive then conventional stores, for me it is about the dollar. I am willing to bet, especially now, no one is any different. So... the dollar and what do you get for it?? If you buy a head of iceberg in the store for say $2 and the farmer market has a bag of harvest-fresh that morning for the same cost $2 (organic) no difference right? But there is on many levels, first the head of grocery lettuce has been bouncing across country for some time, second how much of that $2 stays here local in the community? Would you believe on $.20? Yes that is about average. The market lettuce, picked and cleaned that morning, unless you have your own garden, the word for that is FRESH. Now how much of that $2 stays here local to the community? $1.00!! To me that is key to how I spend my dollar, in the times today it is important to buy local, support local and while your at that, you benefit from fresh, healthy food!

Organic or not is totally your call, but I do encourage you to buy local while things are in season. The flavors of fresh can be compared to none!

                                          copyright catmacera2012.

So here is my bounty! 3 pkg of Swiss chard, 1 pkg fresh spinach, 2 heads of lettuce, 1 bunch scallion, 12 bulbs of garlic (which by the way will last me longer then this week, although not by much, we just love garlic!), 1 lg zucchini, 1 dz Farm Fresh Eggs, 4 1/2 lbs potatoes!! Beauty isn't it?

Lets start with zucchini: I got a total of 4 c grated! The zucchini was from HARC's garden ! Cost $1.00!!


Zucchini Deep Dish Pie and Salad (feeds 4 at $2.00 per person)

2 c grated Zucchini
1 small onion (or half a large)
3 strips of bacon
3/4 c flour
1 tsp baking soda
1 tsp kosher salt
3/4 tsp black pepper
1 8 oz of JFF cream cheese, room temperature
3 eggs, room temperature
1/4 c Parmesan cheese
1/2 c milk
1 tbsp chopped basil

Preheat oven to 350 degrees F. Lightly grease a 10" deep dish pie pan. (or 2-8" regular pie pan)

In a large skillet fry bacon until crisp. Remove to a paper towel. Crumble when cooled. Remove all but 2 tbsp of fat from pan. Add onion and cook until softened and just turning golden. Allow to cool slightly.

In a large mixing bowl beat the eggs and cream cheese together until light and fluffy. With mixer on low add in the milk, Parmesan cheese, s/p, basil. Whisk together the flour and baking soda then slowly add to the wet ingredients.  Fold in the zucchini, onion and bacon.

Pour into prepared pan (s) and place on a baking sheet.

Bake at 350 degrees F for 50-60 minutes. Remove from oven and place on a cooling rack. Let stand for 15 minutes before serving.

Salad

1 head of FairHaven lettuce
1 clove garlic, minced
s/p, to taste
1/3 olive oil
3 tbsp balsamic vinegar
hard cheese shavings

Rinse and drain the head of lettuce. Remove core and gently tear the leaves. In a medium bowl whisk together the oil, vinegar, garlic. Taste, adjust the flavor. (I like mine to be on the vinegar side). Season with s/p. The best way to see if the dressing is to your liking is to taste with a piece of lettuce.

Place lettuce in a bowl, drizzle with dressing, toss gently to just coat the leaves. Serve with a slice of pie and add cheese shavings.


Monday, July 16, 2012

Fried Zucchini and Green Tomato with a Garlic yogurt sauce

Even with this dry heat we are still getting some great produce at the market! This is do to the extra hard work that is put in by the farmers, it is truly amazing the work they put in to providing us with fresh produce! This is great snack, served hot or room temperature. Using the FairHaven Farm garlic is so delightful in this recipe, I got the zucchini from Herkimer ARC and the tomato from the Lapps.


copyrightcatmacera2012
How about a zucchini sandwich, grab some fresh bread from Jcookies, slice and lightly butter one side,  add some of you favorite melting cheese, like maybe the JFF Esperanza. Or how about a fried green tomato for breakfast, serve on top of tomato ham (or bacon) and a poached egg. Veggies for breakfast!!


1 zucchini
3 med green tomatoes
1 c corn meal
s/p
1/4 tsp cayenne pepper (to taste)
2 eggs
oil for frying

1/2 plain yogurt
2 garlic cloves, minced

Stir together the garlic and yogurt, season with s/p, a couple of hours before you'll be using, refrigerate. Bring to room temperature before serving.

Thinly slice the zucchini and tomato, about 1/4". Have 2 plates: place cornmeal on one and season with s/p and cayenne pepper, stir to combine. On second plate, lightly beat eggs.

Heat a skillet over medium heat, add enough oil to have about 1" or so.

Dip both sides of zucchini into egg, drain off excess then dredge through the corn meal, on both sides. Repeat until all zucchini has been done and do the same for the tomato.

When oil is hot, carefully fry zucchini, about 1-2 minutes per side(.Adjust heat as not to burn) Drain on paper towel.

Optional: sprinkle with some Parmesan cheese, while hot from the pan.

Friday, July 13, 2012

Carribbean Goat


This was provided by Patti from FairHaven Farm. What a great recipe!


1 c curry powder ( can go as low as 1/2 c)
3 sprigs fresh thyme
3 jalapeno peppers, finely chopped (to taste)
2 onions, diced
1 bunch scallions diced
s/p
1/4 c canola oil (I used grape seed oil)
1/2 c fresh chopped garlic
4 lb bone in leg of goat (from FairHaven Farm of course!!)
1 carrot diced
2 tomatoes diced
1 lb potatoes diced
1/2 c fresh ginger chopped
3 quarts chicken stock


Combine curry. thyme, jalapenos, onions, scallions and s/p. Rub this all over the goat leg and marinate over night. Reserve any left over marinade. Heat oil in a large cast iron pan over med/high heat (big enough to hold the leg with some room). Add place roast in pan and sear on all sides (about 4-5/side). Add in garlic, cook for 1-2 minutes. Add in reserved marinade, carrots, potatoes,tomatoes, ginger and stock. Stir and bring to a boil, then reduce heat and cover and simmer over low heat for 2-2 1/2 hours or until meat is very tender and almost falling off the bone.

Remove roast to a platter and cover with foil. Return the pan to medium heat on stove and simmer down sauce until nicely thickened. Adjust seasoning.

Serve with rice and beans, grilled flat bread.


Tuesday, July 10, 2012

Turnip Salad

I just love turnips, from when they are small (often referred to salad turnips) to when they are a little larger. When they young, they offer a great crunch in all dishes when used raw. This another way to enjoy a "coleslaw" salad, especially for those that do not care for cabbage!

                                                    catmaceracopyright2012

1 bunch turnips
mayonnaise
s/p
1 tbsp granulated sugar
1-2 tbsp red wine vinegar

Rinse and lightly scrub the turnips, then remove the tops and the roots. Shred the turnips into a large bowl. Add just enough mayonnaise to coat, then add in sugar and vinegar. (If you like more of a dressing in the salad, add just a little more mayonnaise). Stir well, season with s/p. Taste and adjust flavors. (I like mine more in the vinegar side then the sweet side).

Cover and refrigerate before serving.


                                          catmaceracopyright2012

Sunday, July 1, 2012

Grill Roasted Chicken

 FairHaven Farm now offers free-range chicken!! Trust me this chicken is some of the best I have had! Meaty (you could feed an army with it!), skin that actually crisp beautifully when roasted, and yums (pan drippings) are just fantastic for a stock. Of course after you pick the bird clean, you save the carcass for stock making! I got 3 good meals from one bird, not counting making stock from the carcass!


                                                  catmaceracopyright2012

Why free range, grass fed organically raised? Well,  1) it is the best life for a chicken, 2) you can see the difference, there is more meat and less fat, 3) just the taste alone makes it worth buying. This is what chicken should taste like! I used very little flavoring and oil when I made this chicken (and the oil was only so that the spice would stick!). Since I have been eating this type of chicken, I find I eat less, because there is an actual flavor of chicken, so I am more satisfied! I always encourage people to roast a free range chicken, they stay moist, have full flavor but I also say to slow down when you are eating, enjoy it, savor it!! You worked hard for the money you spend on shopping, you deserve the best and have earned the right to enjoy flavorful food!

1 FairHaven free range chicken (I had a 6 lb bird)**
4 scallions
1/2 tsp ground fennel
1/2 tsp dried marjarom
1/2 tsp lemon grated lemon peel (fresh or dried)
1/2 tsp dried thyme
s/p
2 tbsp olive oil

Preheat the grill on high (or preheat oven to 450 degrees F). My grill has three burners in a row.

Make sure the bird is thawed, rinse in cold water inside and out. Pat dry with paper towel (pat the inside as well).

Place in a cast iron fry pan (or roasting pan) Stuff the scallions in the bird cavity. Rub the bird with 2 tbsp of oil, sprinkle with herb mixture, salt and pepper.

Place pan on grill, turn off center burner and turn the outer two to med. Close lid. Cook for about 2-2 1/2 hours. ** 20 minutes per lb cooking time, so adjust to your size bird.

If you are oven roasting, Place pan in oven, roast for 20 minutes, then lower heat to 350 degrees F. Continue to roast for 2 hours and 10 mintues.

If the drumstick moves freely when wiggled, and the juices run clear the bird is cooked. Remove from the grill/oven and let rest for 20 minutes before carving.

Meal # 1

I carved half the bird, cut the breast into 6 thick chunks, drumstick, thigh and of course the wing in my house is the chef's sample! I served this with Isreali coucous, sauted spinach from the Guardi Farm and fresh strawberries (from Lapps Produce) salad, recipe to follow...

                                                              catmaceracopyright2012


Isreali Couscous Salad

1 c Isreali couscous (find in the international aisle of grocer)
2 1/2 c water
1 tsp kosher salt
1 bag Guardi Spinach
1 qt strawberries, (fresh or frozen, or any fruit that you like) cleaned and hulled
2 scallions, diced
1 tbsp olive oil
2 tbsp honey


Bring 2 1/2 c water to a boil. Add in couscous. Cover and reduce heat to a simmer, cook for about 15 mintues. Check to make sure all the water has been asborbed, remove from heat, leave covered for 5 mintues.

In a large skillet saute scallions in oil over medium heat until soft, about 5 minutes. Meanwhile, rinse the spinach and give it a rough chop. When onions are soft, add in the spinach and allow to wilt, season with s/p. Add in couscous, stir to combine. Add in berries, and gently stir. Drizzle with honey and let warm through for about 5 minutes.

Meal # 2 Garlic Scapes, tomatoes, cheese and Chicken


If you tried FairHaven Garlic scapes thursday and you bought some, you will want to try this. Cooking the scapes this way, actually changes the flavor! They have more of a green bean sweetness to them!

2 handfuls of Scapes
Left over chicken, about 1 1/2 c shredded
8 oz of stewed tomatoes, drained
1 tsp dried basil
1 tsp dried oregano
2 tbsp olive oil
1 tbsp butter
1/2 c cubed fresh mozzerella (or your favorite cheese, a Jones Family Farm cheddar would be nice)
1/2 c toasted walnuts, diced (optional)


Rinse the garlic scapes, remove the bulb.


Bring about 4" of water to a simmer in a large pot. Place scapes in a strainer (one the fits the pan), place over water and cover. Let steam for about 20 minutes. Remove from steam and set aside.

Melt the butter in the olive oil in a large skillet pan. Add the scapes and toss to coat. Add tomatoes, and spices. Let cook together for about 5 minutes, then add in chicken. Heat through. Add in cheese, remove from heat and let stand for about 5 minutes, cheese will just start to melt.

Place in a platter and sprinkle with walnuts.


Meal #3 Chicken and sweet pea salad


Left over cooked chicken
Mayonnaise
Honey Mustard Dressing (optional).
s/p
1/2 c cooked Sweet peas
4 hard boiled eggs, peeled and chopped
lettuce

Fine chop chicken (do in a food processor if you like), place in a large bowl. Add in sweet peas. Add desired amount of mayo and about 1/8 c honey mustard. Stir to combine. Adjust seasonings. Gently fold in egg. Chill until ready to serve.

Serve over lettuce with bread slices. This would also be good in hollowed out tomato, as sandwich, served with chilled cantaloupe and melons (my favorite time of the year).

Each meal here can easily feed 4 people each!

Meal #1 $2.25 per person

Meal # 2 Cost $2.69 per person

Meal #3 Cost: $1.62 per person!


Saturday, June 30, 2012

Spiced Bluberry Soup


A friend of mine posted this on facebook, it sounds like it would be good to have this summer either as a light lunch or as a starter to a dinner when specila guest are invite.

Spiced Blueberry Soup

Spiced Blueberry Soup Recipe Delightful and refreshing, this chilled soup works as an appetizer, dessert or snack. If using frozen blueberries, cover the pan in Step 1 to bring the cold blueberry mixture to a boil more quickly.


From EatingWell: August/September 2006
8 servings, about 1/2 cup each | Active Time: 20 minutes | Total Time: 5 hours 20 minutes
Ingredients

  • 4 cups fresh or frozen (not thawed) blueberries, plus more for garnish
  • 2 cups water
  • 1 whole cinnamon stick
  • 2 tablespoons honey, or more to taste
  • 1 tablespoon chopped fresh ginger
  • 2 cardamom pods, (optional)
  • 2 tablespoons cornstarch
  • 1/3 cup low-fat milk
  • 1 cup 4 teaspoons reduced-fat sour cream, divided
Preparation
  1. Combine blueberries, water, cinnamon stick, honey, ginger and cardamom pods (if using) in a large saucepan. Bring to a boil, stirring occasionally. Reduce heat and simmer, stirring, until most of the blueberries have burst, 1 to 2 minutes. Remove the cardamom pods and cinnamon stick. Puree the soup in 2 batches in a blender until smooth (use caution when pureeing hot liquids). Place a fine sieve over the pan and pour the soup through it back into the pan, straining out any solids. (Discard the solids.)
  2. Whisk cornstarch and milk in a measuring cup until smooth. Whisk into the blueberry mixture. Bring the soup to a boil over medium heat, stirring. Boil, stirring constantly, until the soup thickens slightly, about 1 minute. Remove from the heat and let cool for 10 minutes. Transfer to a bowl, loosely cover and chill until cold, at least 5 hours or up to 2 days.
  3. Just before serving, whisk 1 cup sour cream into the soup and ladle into bowls; top each serving with 1/2 teaspoon sour cream and swirl decoratively into the soup. Garnish with additional blueberries, if desired.
Tips & Notes
  • Make Ahead Tip: Prepare through Step 2 and chill for up to 1 day. The finished soup will keep in the refrigerator for up to 5 days

Friday, June 29, 2012

Sun-dried Tomato and Garlic Scape Pesto Grilled Pizza

I just love garlic! We start the produce season with green garlic, milder and sweeter. We are now at the second gift from our vendors of garlic growers, scapes!! There are many things you can do with scapes, one of course being pesto. Make it now, keep in the freezer. (I have ice cube trays that I use to freeze the pesto in, giving me about a 1/4 c with 4 cubes. Now I can grab a cube or two to add to whatever I am making**)

I paired sun-dried tomatoes with this pesto, becasue they bring a nice sweetness to the scapes. I also carmaelize the scapes slightly and the fresh mozzerella brings in a nice creaminess. You can easily bake this pizza in the as you would any pizza, but grilling offers a wonderful crispness and slighlt smokey flavor.

                                                    copyright cmacera2012

4-5 sundried tomatoes*
1 c chopped garlic scapes (8-10 scapes), white flower tip removed
1/2 c grated hard cheese (I like Jones Family Farm Marguerite, but you use a parmesean)
3/4 c olive oil
1 tbsp lemon juice
1/4 c toasted walnuts
s/p

1/2 lb fresh mozzerella, cubed

pizza dough

If you are using sun-dried tomatoes that in olive oil, drain the chop. If you a ones that just dried, cover them with boiling water and let stand for about 15 minutes. Drain.

In a large skillet saute scapes in about 2 tbsp olive oil, until tender and slightly colored. Remove from heat and allow to cool.

Place scapes, tomatoes in a blender or food processor with about 1/4 c olive oil and lemon juice. Blend until fairly smooth. Scrap down sides. Add in walnuts, pulse about 5-6 times. With the machine running, slowly drizzle in the remaining oil. Stop the machine and scrape down the sides, add the cheese and pulse about 5-6 times (don't over blend the machine could melt the cheese). Taste and adjust the seasoning with s/p.

Store in an air-tight container, pour just a thin layer of olive oil over top. This will last for several months in the refrigerator.

Preheat grill on high.

Lightly oil a baking sheet pan; set aside. Roll out dough about to about 1/4". Place dough on baking sheet. Transfer to the grill oil side down. Turn heat to low and close lid, let grill for about 5 mintues, (lift the dough with a spatula to see how golden it is). Lightly oil the top of dough. Using spatula under the middle to flip, carefully. Evenly spread pesto over cooked side. (I used 1 c) layer out the cheese evenly. Close the lid and finishing cooking for about 4-5 minutes, or until cheese just starts to melt.

Slide on to a bking sheet or cutting board. Allow to stand for about 5 minutes or so.

**Once the pesto cubes are frozen, pop them out into a freezer bag. Add to sauces,soups even mashed potatoes!!

Tuesday, June 26, 2012

Saute Garlic Scapes

This recipe was sent in from one of the Markets weekly customer who found it at Mother Earth News.

 Debra said, "I made this last week - and thought it was a definite keeper. Actually think that it would be good after the season with just the tomatoes, quickly cooked." Fantastic, Thank you for such a great share Debra!!


212-078-Kitchen-1-CMYK.jpg


 Choose scapes that are very young and tender, taking care to trim off the bottoms of the stems and the tips of the flower heads. The recipe that follows is best when made the day before serving and then refrigerated. Let it stand at room temperature before serving.

2 tablespoons virgin olive oil
2 tablespoons dark brown sugar
8 ounces young garlic scapes, trimmed
1 1/2 cups coarsely chopped tomatoes
3/4 cup dry white wine
1/4 teaspoon freshly ground pepper or to taste
1 teaspoon salt or to taste
1 tablespoon chopped parsley
1/4 cup grilled haloumi cheese,
cut into very small dice (see note below)

Heat the oil in a broad sauté pan and add sugar. Stir to caramelize the sugar for about 2 to 3 minutes and add the scapes. Cover and sauté over a medium-high heat for no more than 3 minutes, occasionally shaking the pan to prevent the scapes from scorching. After 3 minutes, add the chopped tomatoes and wine. Stir the pan, then cover and reduce the heat to low; continue cooking 5 to 6 minutes, or until the scapes are tender but not soft. Season, then add the parsley and haloumi, and serve at room temperature.


***

If you can't find Haloumi cheese, I would use maybe Jones Family Farm cheddar or even their feta.
***Also remember that can freezer pesto, so grab scapes while in season, make some pesto and freezer for later use!!

Skirt Steak with Roasted Potato, Broccoli and Cheese

When things get busy I am always looking for a dinner that goes together fairly quickly but offers great flavor. I also like when I can serve everything on one platter, which makes clean easier. To make this even easier do some prep a few days before. Use left over boiled potatoes, have broccoli trimmed and grate cheese.

1 lb new potatoes (if using leftovers you'll need about 2 c cubed), cubed
2 c broccoli florets
1/2 c shredded JFF cheddar (or your favorite)
s/p
1 lb skirt steak
olive oil
butter
1/2 garlic scapes, chopped
1/8 c chopped fresh parsley


In a large cast iron skillet heat 3 tbsp olive oil and 1 tbsp butter over med/high heat. Carefully add in potatoes, tossing to coat. Season with s/p. Continue to cook, for 15-20 allowing the potatoes to brown nicely, giving a stir often. Rinse broccoli and drain most of water off. When a potato still has slight resistance when pieced with a knife, add the broccoli. Place cover on pan. Reduce heat to low/medium.

In another skillet heat about 1 tbsp of olive oil over med/high heat. Season skirt steak with s/p. Carefully add the steak to skillet, let cook for 5 minutes. Turn and continue to cook for another 5-6 minutes. Remove to a cutting board, tent with foil and allow to stand for about 10 minutes. In the same skillet, add another 1 tbsp olive oil. Add garlic scapes to skillet and saute until slightly golden and tender. Season with s/p. Remove from heat and add in parsley.

Place potato and broccoli on a platter, sprinkle cheese over. Slice the skirt steak into thin slice at an 45 degree angle against the grain. Place over potato/broccoli/cheese. Drizzle garlic scapes over meat.


Wednesday, June 20, 2012

Garlic Scapes

If you have never had these, make sure they make your list of new things to try!! Wonderful, curly stems of the garlic are milder in flavor compared to the garlic clove. Here is a site that has several recipes using garlic scapes!


Pickled Garlic Scapes  http://www.seriouseats.com/recipes/2010/06/the-crisper-whisperer-what-to-do-with-garlic-scapes-recipe.html


I like to make dressing as well. It is great as sandwich spread, or add to scrambled eggs!
Recipes f...


2 garlic scapes, coarsely chopped
4 tbsp chives, chopped fine
1 teaspoon honey
1tsp Dijon mustard
1/8 c house vinegar (red wine vinegar)
Zest and juice of half of a lemon
pinch kosher salt
 fresh ground black pepper, to taste
1/2 cup extra virgin olive oil

In a blender or food processor combine the garlic scapes, chives, honey, mustard, red wine vinegar, lemon juice, salt, and pepper. Blend until smooth. With blender on low, slowly add the olive oil until well blended.
Try this dressing with:
3 beets (golden are great any will do) leaves removed but short stems intact
2" piece of fresh ginger, finely grated
salad greens
1/4 c dressing
1/2 c toasted chopped walnuts
Preheat oven to 400 degrees F. Wash and dry beets, place in roasting pan. Drizzle with oil an season with s/p. Roast in hot oven for 50-60 minutes (depending on size of beets). When tender, able to pierce easily with a paring knife, allow to cool slightly.
If you don't want your hands to stain (more so with the red beets) wear gloves. Carefully rub the skin off the beets. Dice into bite-size pieces.
Mix together the dressing with ginger. Drizzle on salad greens, top with beets. Drizzle additional dressing on beets. Sprinkle with walnuts.

Tuesday, June 19, 2012

Refreshing Drinks

Summer is such a great time to make some fantastic drinks! Here are some of my favorite.


Pinned Imagehttp://juliasroomfordessert.blogspot.com/2011/04/strawberry-iced-tea.html


 Pinned Image http://scalingbackblog.com/post/9336405396/blackberry-sage-cooler

Pinned Image http://www.realsimple.com/food-recipes/browse-all-recipes/basil-lemonade-10000001213226/index.html

Pinned Image http://www.sugarandcharmblog.com/2011/06/italian-sodas.html

Mango, Farro and Spinach Salad with Pork skewers

This is a very refreshing salad that is full of flavor. It plays well with the earthy flavored pork. Serve without the skewers for light lunch or a late dinner.


3/4 c Farro (or wheat berries)
1/2 c finely chopped lemon balm
2 tbsp finely chopped fresh mint
3" fresh ginger, grated
3-4 tbsp Wild Mountain Apiaries Honey
pinch salt
1/4 c olive oil
1 lb frozen mango chunks

1 pkg of Gaia's Breath Spinach
Lemongrass oil
s/p

1 lb Wintergrass Pork
2 tbsp Ras el Hanout (http://thefoodshedutica.blogspot.com/search?q=ras+el+hanout)
1 egg
1/4 c bread crumbs


Rinse and sort the farro. Place in a pan and cover with cold water. Bring to a boil, reduce to a simmer, cover. Cook for 30-45 minutes.

In a large bowl combine lemon balm, mint, ginger, honey, oil and pinch of salt. When farro is tender, but with just a bite, drain. While still warm add the farro to flavored oil and stir well to combine. Once cooled, fold in the mango. Refrigerate for several hours, bring to room temperature at least one hour before serving.

Mix together the pork, Ras el Hanout, egg and bread crumb. Divide in 4 equal portions and form to skewers, squeezing tightly. Let stand in refrigerator for at least 30 minutes.

Preheat grill on high. Drizzle skewers is olive oil. Place on grill reduce heat to med/low. Cook for 5 minutes, carefully rotate and cook for another 7 minutes.

Place spinach in a large bowl, drizzle lightly with lemongrass oil. Season with s/p. Spread out on a platter, top with farro salad and skewers.

Friday, June 15, 2012

$$ saving and cleaning tips

I wanted to share this site on how to make your own laundry detergent. If you use the Nels Napatha, and follow the direction, on average this soap will cost about 1 cent/load!! Yes 1 cent, that is not a typo!! I have been making this for about a year now, sometimes I buy some handmade soap, so does average to be a little more, but still a savings. Make sure you check out what soaps FairHaven Farms has to offer, Patti has some great scents!!

 It doesn't take long to mix, so it is worth the effort. I have very sensitive skin, so I like making my own, less chemicals and perfumes. I have used the Ivory soap, also, which you can find in the dollar stores. After mixing and letting it stand according to the directions, I transfer the soap to milk gallons jugs that washed. I give it a little swirl before pour to redistribute and use about 1/2 c, 3/4 c for a "dirtier" load. This doesn't get as "sudsy" as commercial soap, but it washes everything clean! Give it try and let me know what you think.

http://www.thefamilyhomestead.com/laundrysoap.htm


Here is a fantastic inexpensive De-greaser, soap scum and a general all purpose cleaner.


You will need:

1/2 c Dawn liquid Dish detergent
1/2 c white vinegar
a spray bottle

Heat the vinegar until just warm. Pour this into the spray bottle. Add the Dawn to the bottle, and swirl the bottle gently to just combine. Spray on shower walls, let stand for 1 minute, wipe and rinse well. I also use this to clean my stove stop!! I absolutely love this stuff!! (use it to bathroom sink, outside area of toilet)

Just be careful when spray that the vinegar smell doesn't overwhelm!

Tuesday, June 12, 2012

BBQ Sauce

This uses some unusual ingredients, which gives this a slight Middle Eastern flare! They have such spectacular spices over there! If you are looking for spices and want to save a few pennies, don't forget the Little Falls Co-op!! Buying by the ounce, or just the quantity that you need is very cost effective! The have the best customer service to boot!!

                                                        copyright catmacera2012
                                                       
2 tbsp evoo
1 med onion, diced (or try a few shallots or scallion oh and even leeks would be great!!)
4 garlic cloves, minced
2 qt whole tomatoes, with juice
1 tsp dried oregano
1 c apple cider vinegar
1/4 c honey
1/2 c brown sugar
2 tbsp soy sauce*
4 tbsp fresh grated ginger
1/2 tsp cardamom seeds (1/4 tsp ground)
5 whole cloves (1/4 tsp ground)
1 1/2 tsp fennel seed (3/4 tsp ground)
1 cinnamon stick, about 3-4" (1 tsp ground)
1 tbsp light mustard seed (1 1/2 tsp ground)
1 tsp red pepper flakes, optional (more or less to taste)

If you don't have soy sauce (or like me like to control the salt of my diet) you can use 1 tbsp maple  syrup (real) and 1 tbsp balsamic vinegar in place of soy sauce.

In a small skillet toast the cardamom seeds,  whole cloves, fennel seeds, cinnamon stick and mustard seed over med heat, shaking the pan to prevent scorching, for about 3 minutes or until there such a beautiful fragrant smell of these spices! Allow to cool, then grind all(EXCEPT CINNAMON STICK) to a powder in a coffee grinder or food processor. (I found a wonderful coffee grinder at the Goodwill/ARC store for $2!! so make sure to check all of our wonderful 2nd hand stores for kitchen items!!) If you don't have either one of these, don't fret! Place them in a baggy and hammer them!! Or use the ground version and skip the toasting step.

In a large pot, saute onion and garlic in the evoo, over med heat; 1-2 minutes. Add in the cinnamon stick, honey oregano, brown sugar, soy*, ginger. Stir to combine for 1 minute. Add in the tomatoes, vinegar, pepper flakes and ground spices. Bring to a boil, stirring often. Reduce to a simmer, uncovered simmer for 1 1/2 -2 hours. Stirring often. This should become beautifully thicken, and fragrant!

Remove the cinnamon stick. If you like a chunky BBQ sauce, leave as is. But if you like it smoother, use a blender or food processor to smooth out. (be careful, hot liquids expand, so do so in batches!!)

Allow to cool, this makes about 1 1/2 qt. Will last in refrigerator for several weeks. Use on your favorite grilled meats!